
I am a new Salesforce admin as of 2019. My current company needed a new CRM solution, and as a nonprofit, the no-cost price point was extremely attractive. I’ve spent much of this year investing time and energy into getting up to speed on the platform.
To say that the Salesforce ecosystem is huge doesn’t even begin to convey the scale of it. There is a massive amount to learn. Wisdom or folly, I’ve wandered off on tangents that were probably better left for later, when experience more closely matched with ambition.
This is one of them.
Pretty early on, I took a special interest in figuring out how to make Salesforce data available outside of Salesforce.
Now, Salesforce would prefer that you do that via one of their APIs. I’d prefer that, too. APIs make the internet go ’round.
There’s just one problem: Salesforce requires user authentication to get at any of your data.
But what if that’s not practical for your particular use case? It wasn’t practical for mine.
My company has a page on its website with a list of locations presented on a world map and a table. These locations change frequently, and we carefully track it within Salesforce.
Why double our efforts to keep a web page updated too? Wouldn’t it be great if that page could be dynamically built using our Salesforce data?
Clearly, on a public website, Salesforce user authentication is not a plausible solution. We can’t expect visitors to log in with credentials they don’t have just to view a page.
I want a small subset of my Salesforce data to be publicly available. No user credentials. No logins. No OAuth. Remove every barrier to access.
This is not an uncommon question. I’ve researched the topic extensively. It shouldn’t be this hard, but unless I’m overlooking something, it is. I understand the need for data security, but frankly, this seems like a large oversight for a platform that is otherwise extraordinarily well thought out and tended.
But good news: it can be done. We can create a publicly accessible URL that will display portions of your Salesforce data in XML format. From there, you can utilize it in countless ways.
I’ll walk you through the process step-by-step, but please note that this will require some Salesforce savvy. It’s not for the faint of heart.
#1: Create a site on your production org
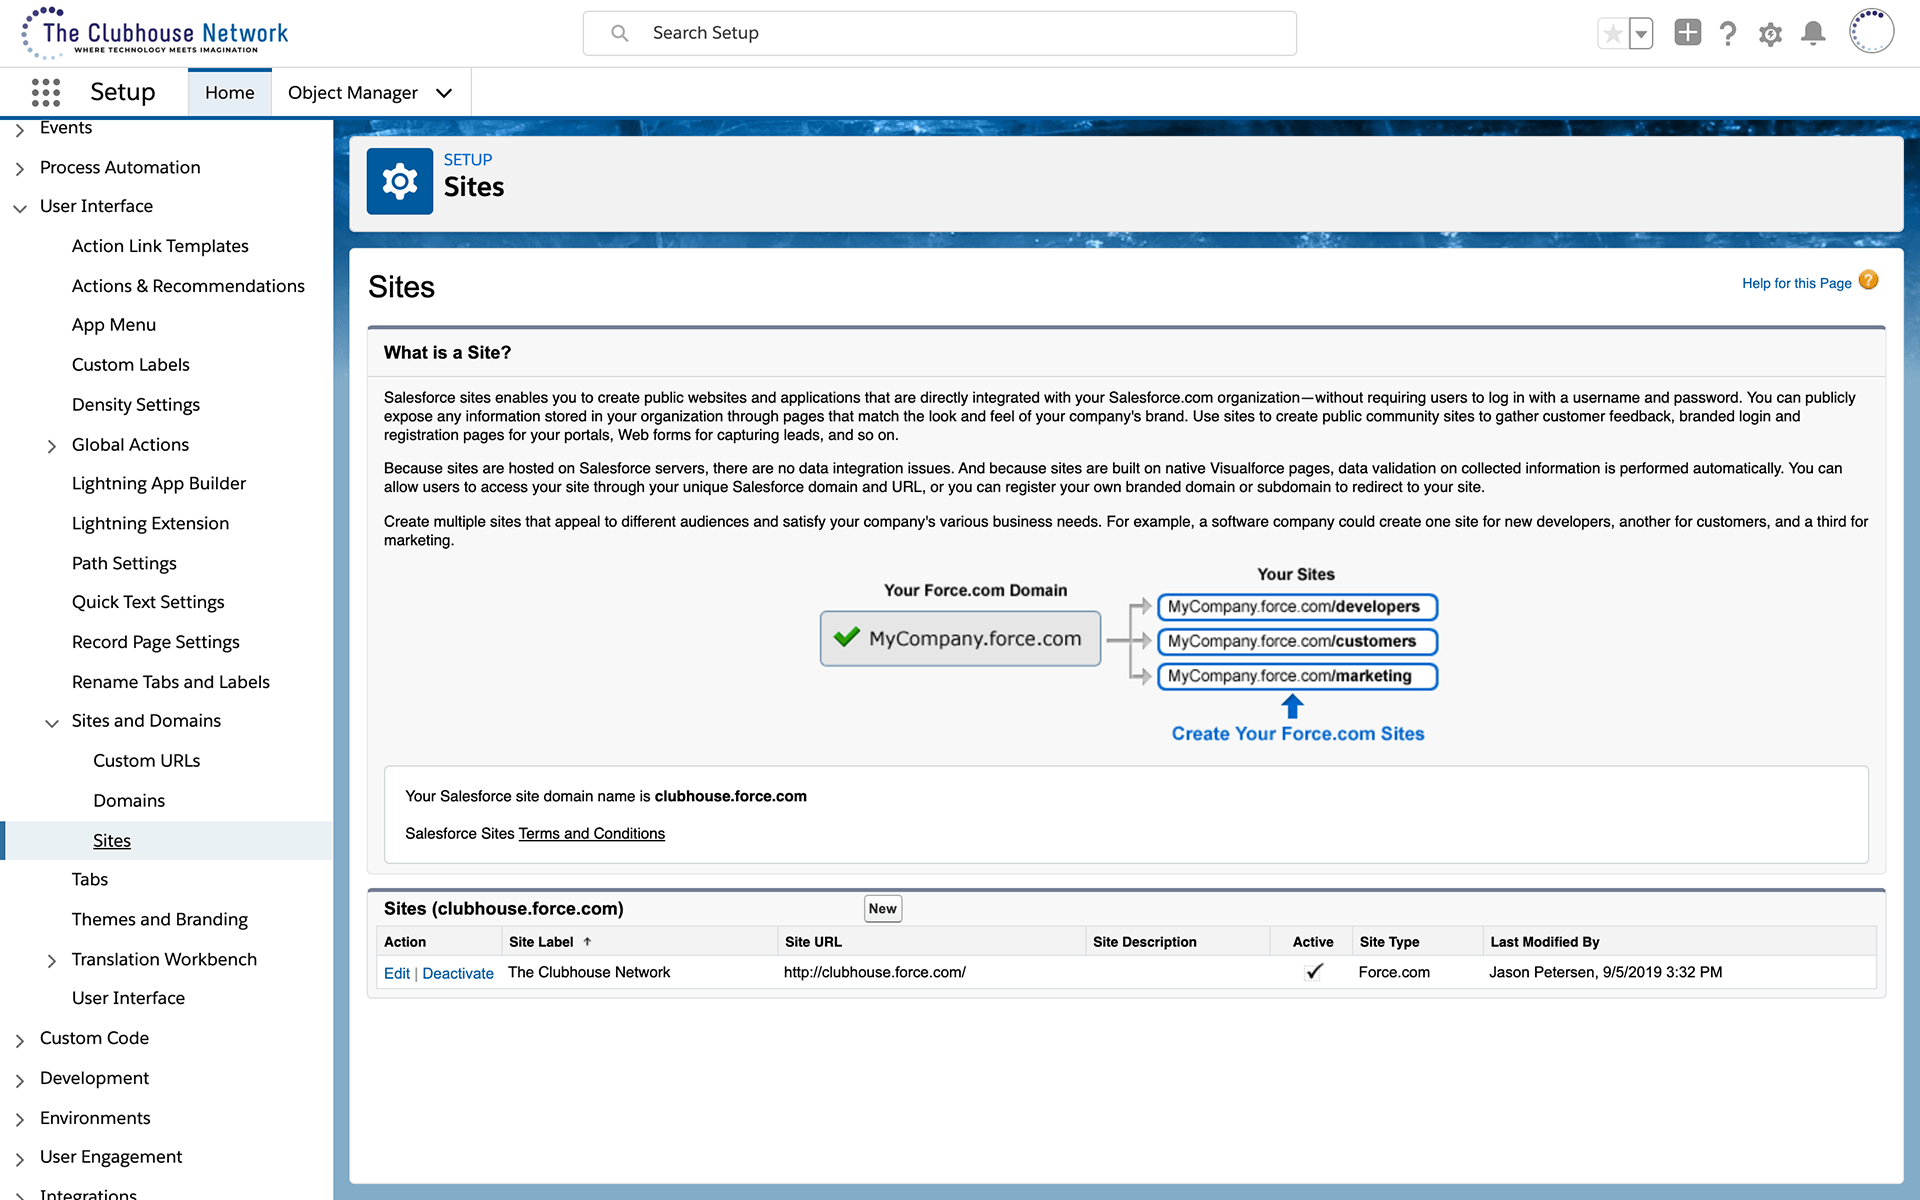
If you haven’t done so already, create a site on your production org.
Setup→User Interface→Sites and Domains→Sites
Click New. Fill in the obvious fields.
A less obvious field: Active Site Home Page. Set this to “FileNotFound”. This will be a publicly accessible site, but we don’t want accidental visitors thinking there’s content here for them to browse. If someone does visit your site, all they’ll see is a “Page Not Found” message. They’re unlikely to loiter around after that.
Once it’s been created, go into the site settings by clicking the Site Label. Then click the Public Access Settings button at the top, followed by the Edit button at the top of the next page.
Scroll approximately 2/3rds of the way down until you find the Standard Object Permissions heading. The data you’re trying to make available outside of Salesforce—what objects do the data reside in? Check the read access boxes for those object types. If they are custom objects, you will find those in the section immediately below this.
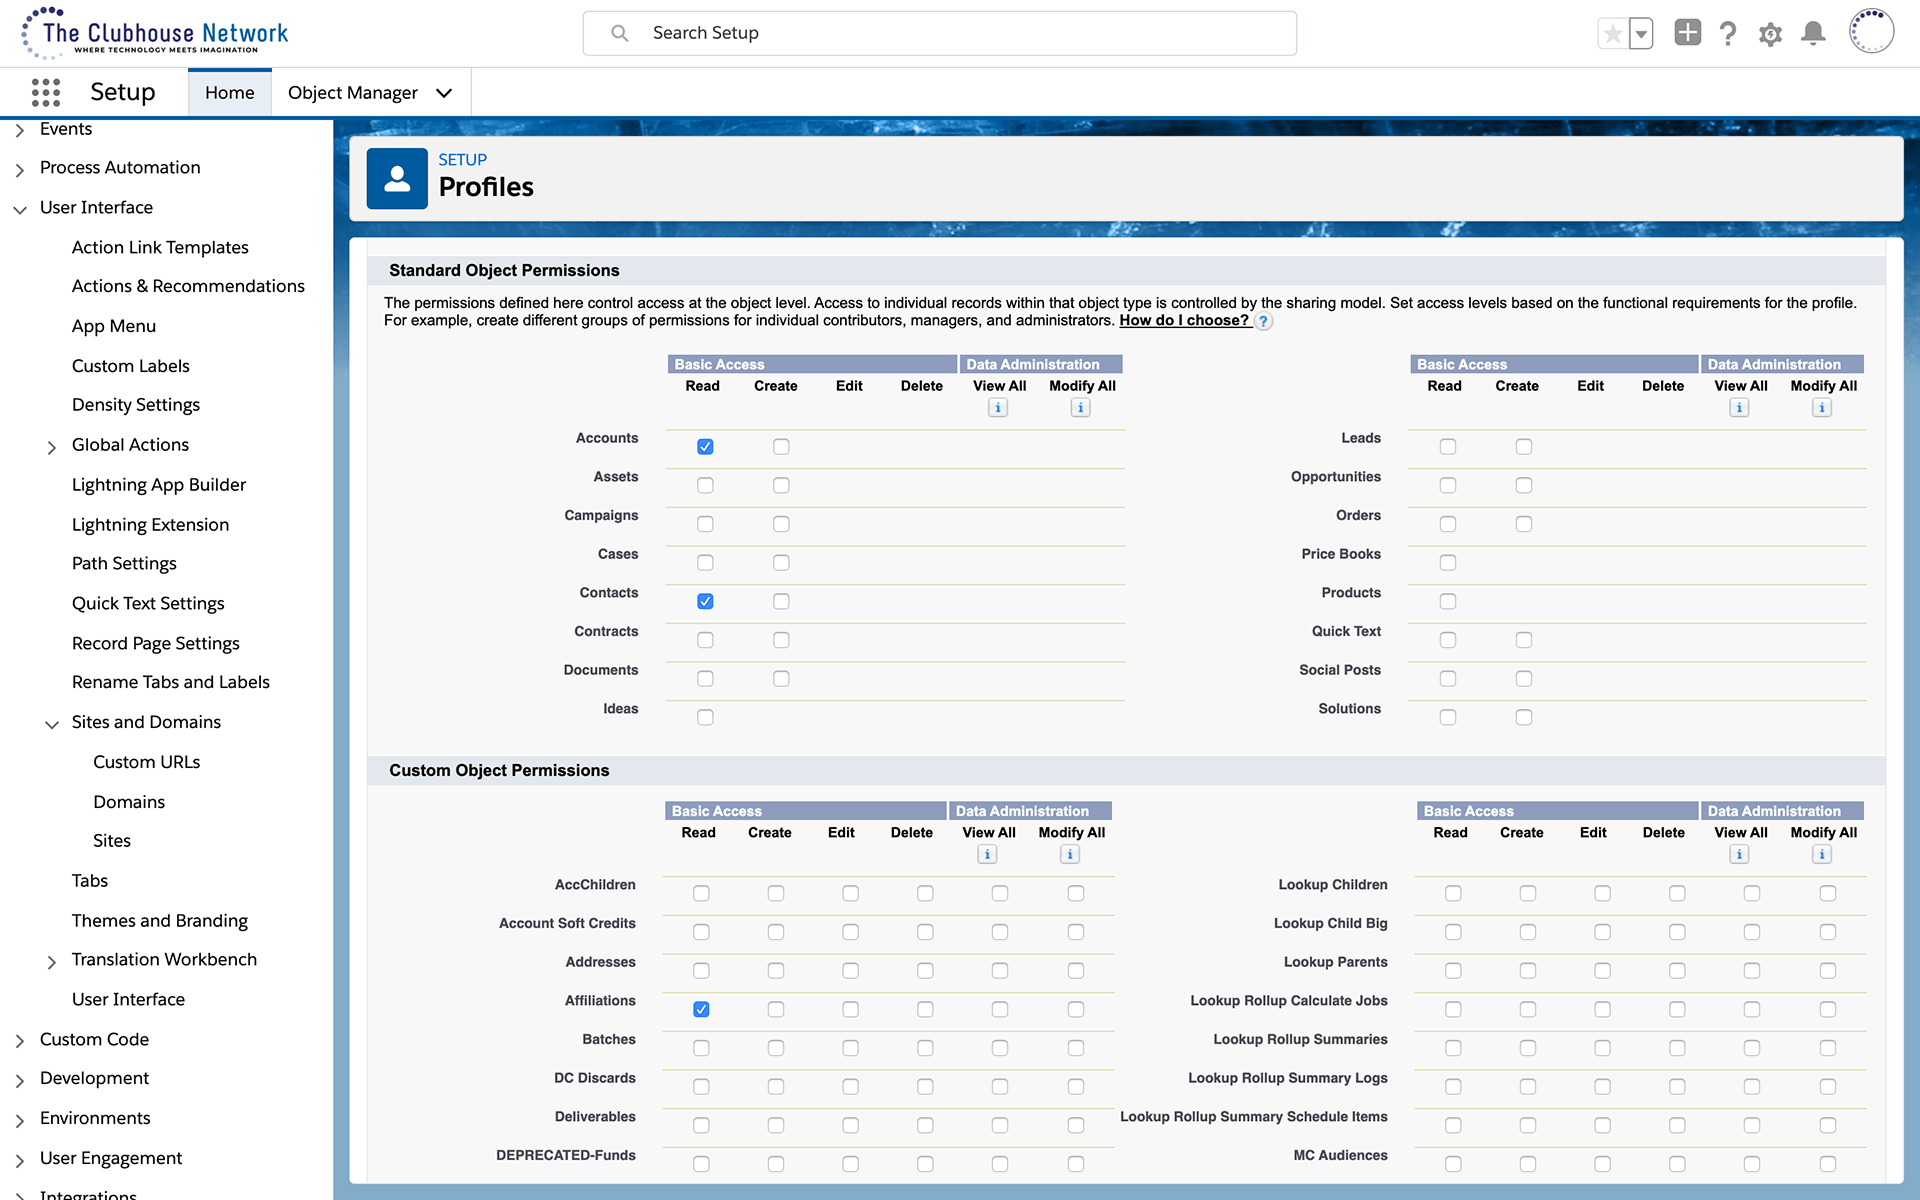
We’ll be coming back to these settings later, but we’re done for now. Click Save.
#2: Create a sandbox org
If you already have a sandbox org, refresh it. We want our sandbox to have the site configuration we just set up in the production org. Otherwise, make a new one.
Setup→Environments→Sandboxes
Click New Sandbox. In this example, I used a “Developer” license.
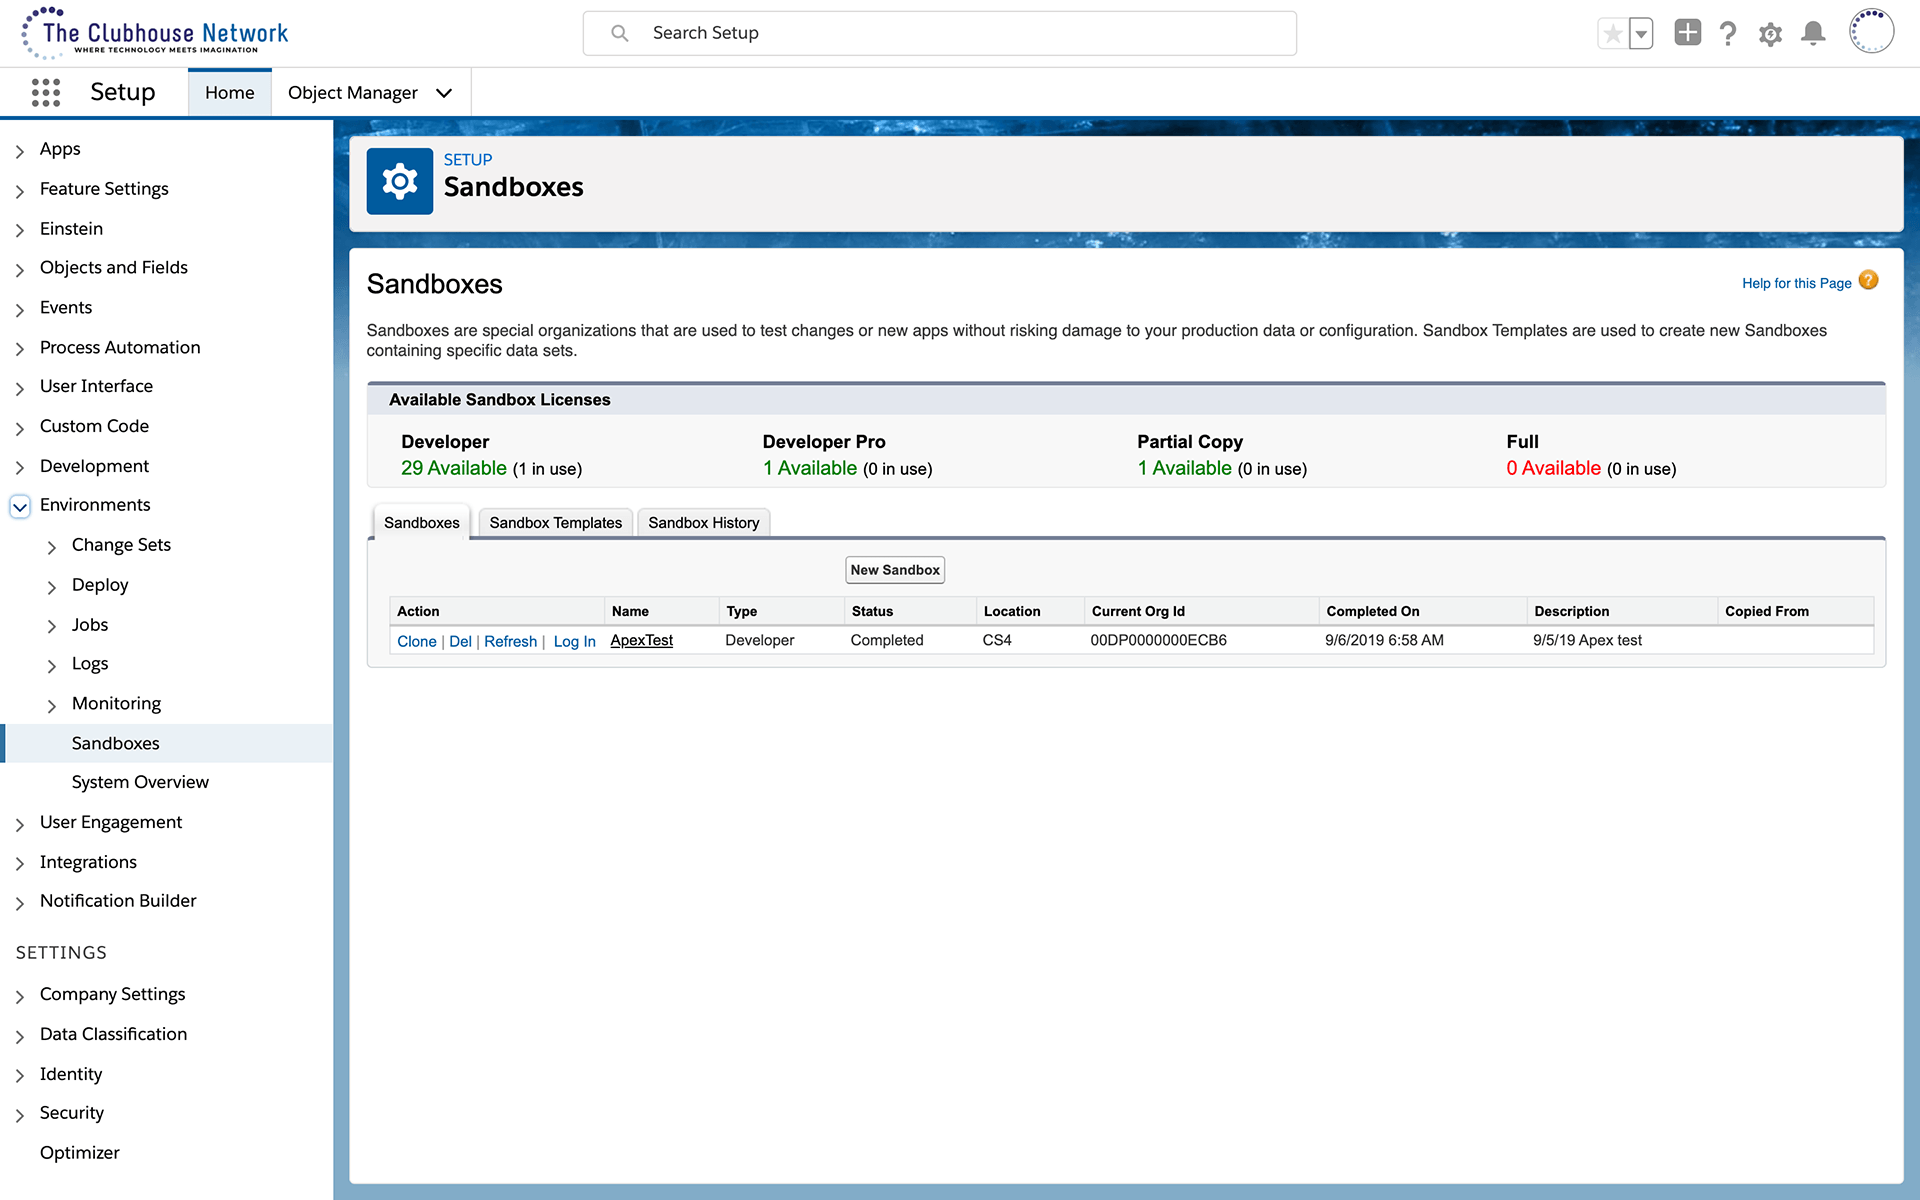
You won’t need very much by way of records in your sandbox, but you will need something to test your ensuing work. A Developer license will not copy over any records from your production org, which is something to keep in mind for the next step.
At the next dialog, do not specify an Apex class. Simply click Create. Note that it may take a little time for your sandbox to be created.
You’ll receive an email when it’s ready. This email will contain all the information you need to log into the sandbox. Follow those instructions.
#3: Create a few records
Once you’re in, if you used a Developer license in the previous step, create a few records on the relevant objects—the objects whose data you’re trying to make available outside of Salesforce.
If you’re dealing with Account data, create a few Account records. If Contacts, create Contacts. You could even export data from your production org and import it into the sandbox, but there’s no need to go overboard; we just need some data to work with here.
#4: Create Apex classes
We have to write a little bit of code. It’s this code that’s going to query the data we want to make available outside of Salesforce.
Time to dip our toes into Apex. Don’t worry: I’ll be with you every step of the way.
Setup→Custom Code→Apex Classes
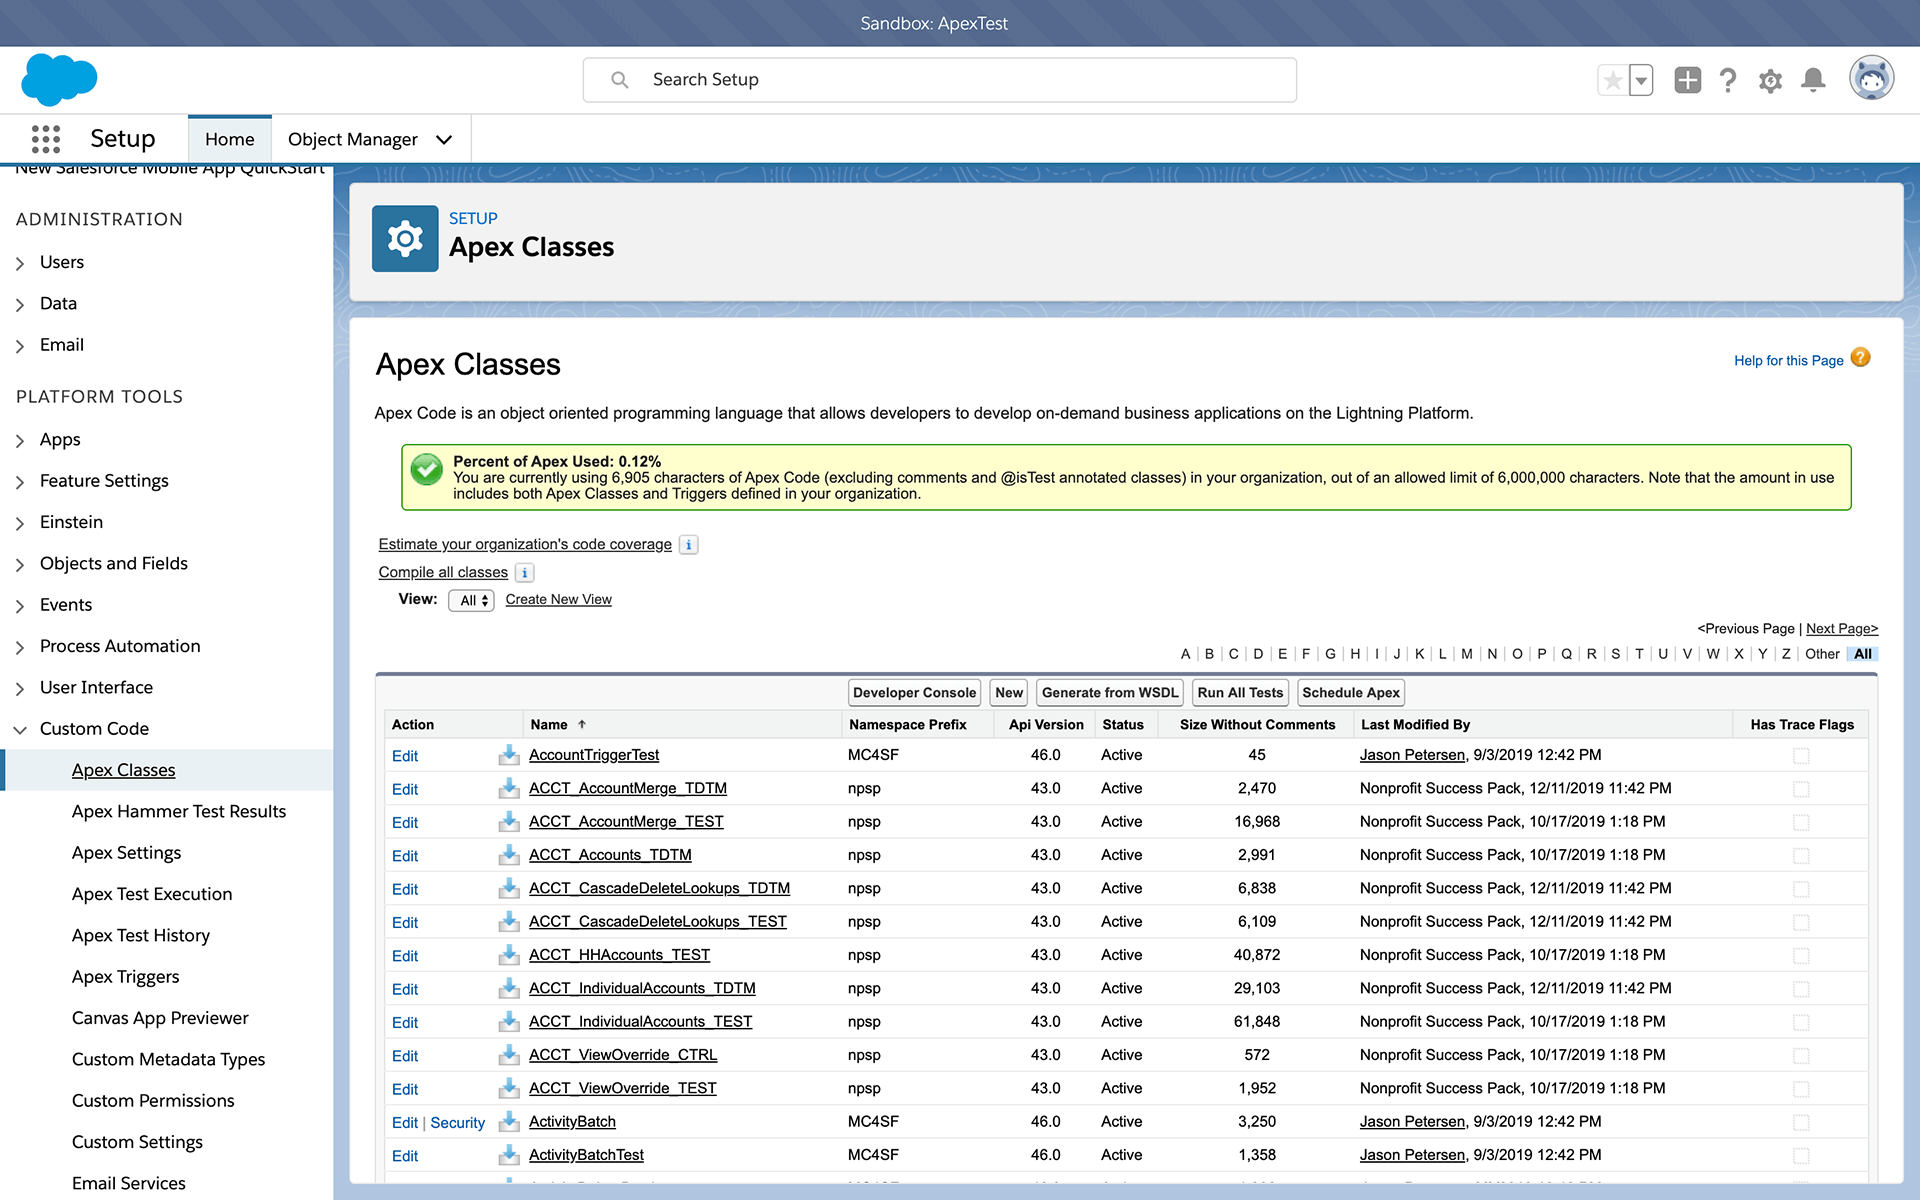
Click the New button. This, by the way, is why we’re in a sandbox: you can’t write new Apex classes in your production org; this button doesn’t exist there. Salesforce wants you to do your testing in a sandbox before deploying it to production. Safety first!
Here’s a good template for an Apex class that will query data from one object type. If you’re not familiar with object-oriented programming (or programming at all) this might look like gibberish, but it’s not as complicated as it seems. We can easily tailor it for your use case.
Apex
@RestResource(urlMapping='/AllClubhouses/')
global class TCNorg_AllActiveClubhouses {
    @HttpGet
    global static List getClubhouses() {
        RestRequest request = RestContext.request;
        return  [SELECT BillingCity,BillingCountry,BillingLatitude,BillingLongitude,BillingPostalCode,BillingState,BillingStreet,Email__c,Name,ParentId,Phone,Website FROM Account WHERE Type = 'Clubhouse' AND License_Agreement_Status__c IN ('Current','Ready','Ready-Contingent','Sent') ORDER BY BillingCountry,BillingState,BillingCity ASC NULLS LAST];
   }
}
Let’s unpack this.
At line 1, urlMapping defines the subdirectory where the execution of this code will happen. Use only alphanumeric characters, hyphens, and underscores.
At line 2, TCNorg_AllActiveClubhouses is the name of this Apex class. This can be anything; just keep it organized. I wrote a half a dozen classes, all named with a preceding TCNorg_. This makes them easy to find.
At line 4, you’re defining the function. <Account> refers to the object type we will query. If you were instead querying your contact records, change this to <Contact>. getClubhouses is the name of the function. Again, this can be anything.
Line 6 is your query—everything inside the brackets starting with SELECT. For this, let’s get an assist from Workbench.
Log in with your Salesforce credentials from your production org. Once you’re in, go to Queries→SOQL Queries. This tool will help you build the query you need.
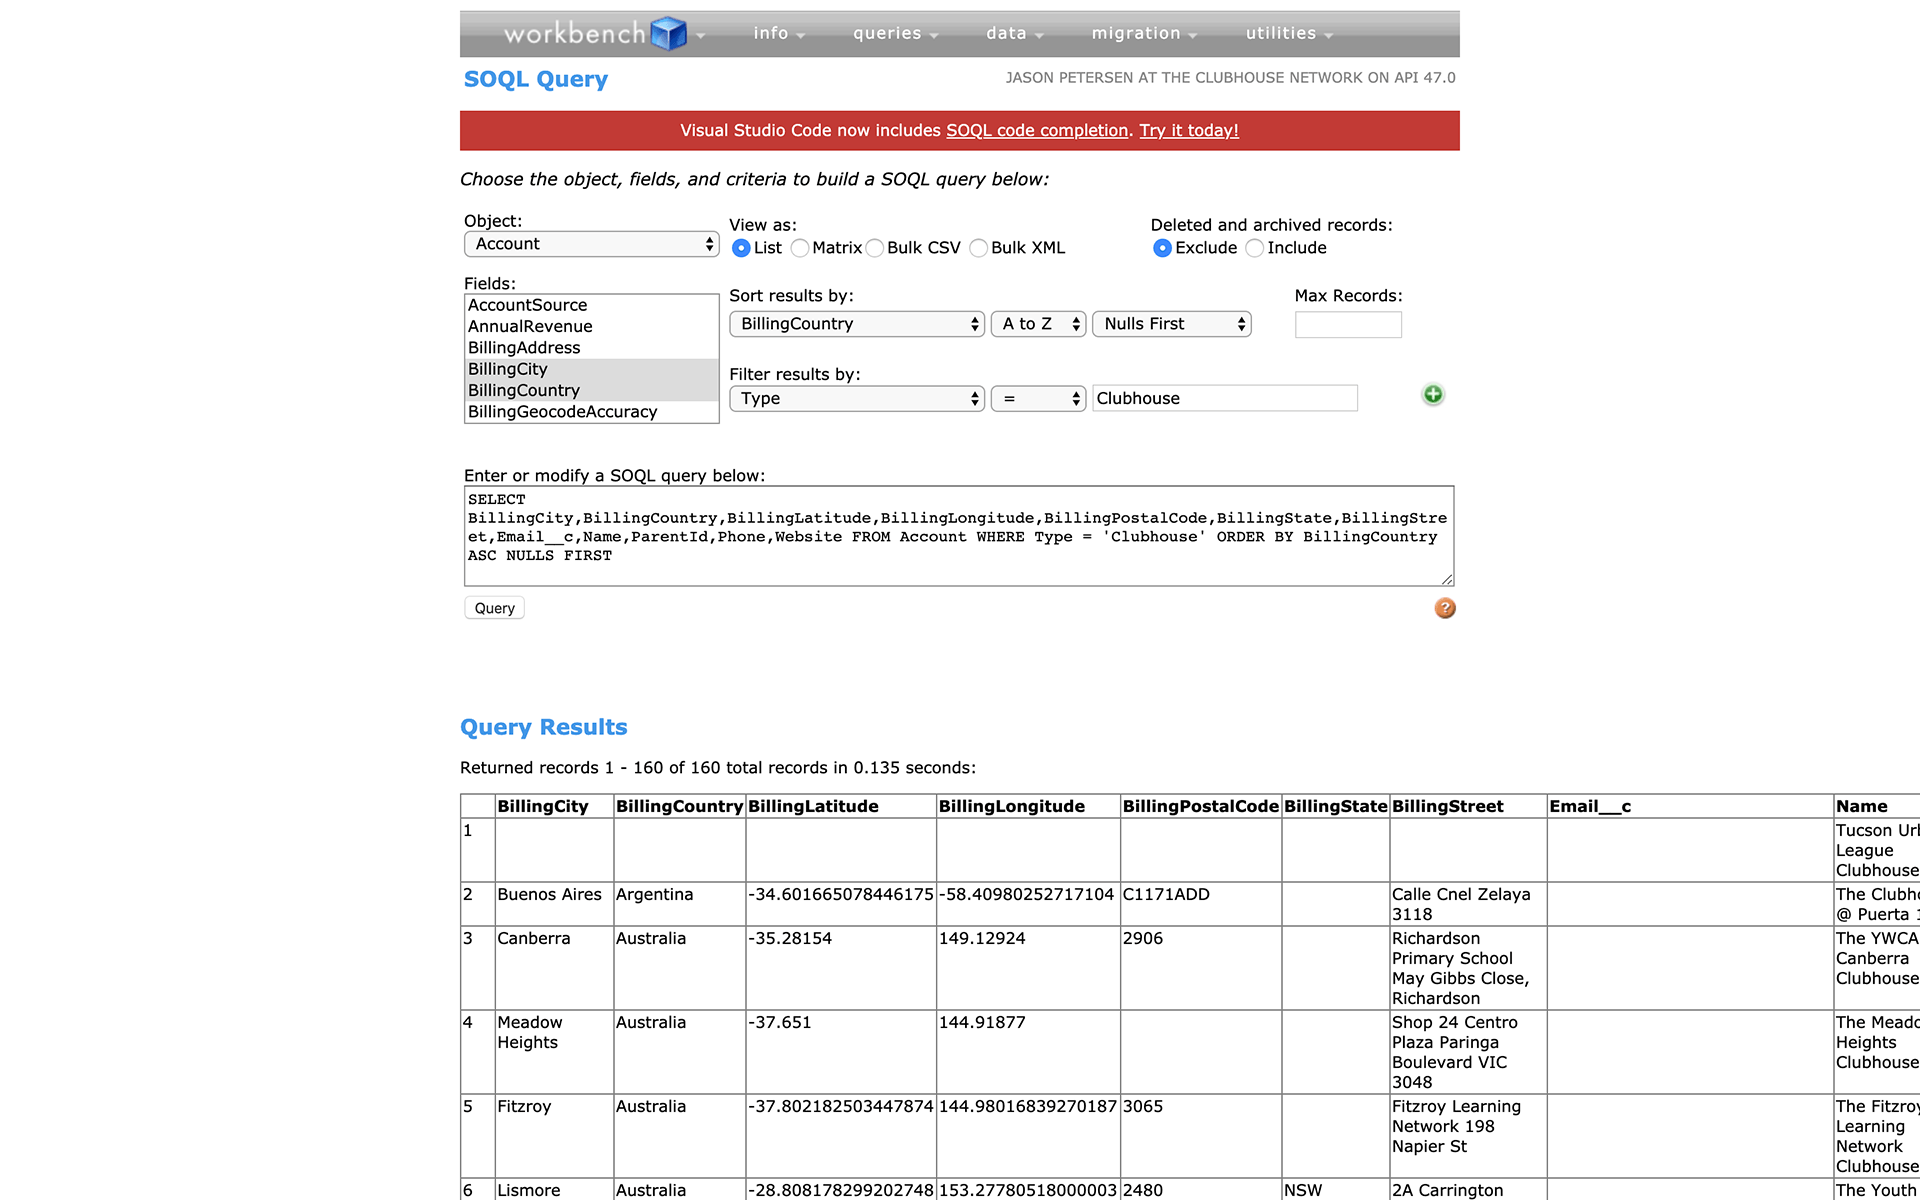
Select your object. Select all the fields you need. Specify your sorting and filters. You can’t break anything; tinker around with this until you’ve honed your query.
This is extremely important: be precise. If your query is returning half your database, it isn’t specific enough. You want to work this query to the point that it’s only returning exactly the data you want to be publicly available—no more, no less. Once you’re seeing the precise results you’re expecting, copy the select statement and paste it into line 6.
That’s it. Not so painful, right? Use this template to build as many Apex classes as you need.
Final note: click the Version Settings tab. The first line says Salesforce.com API. This version number should ordinarily correlate with your production org version, but sometimes it doesn’t. If there is a discrepancy, make sure you correct that here.
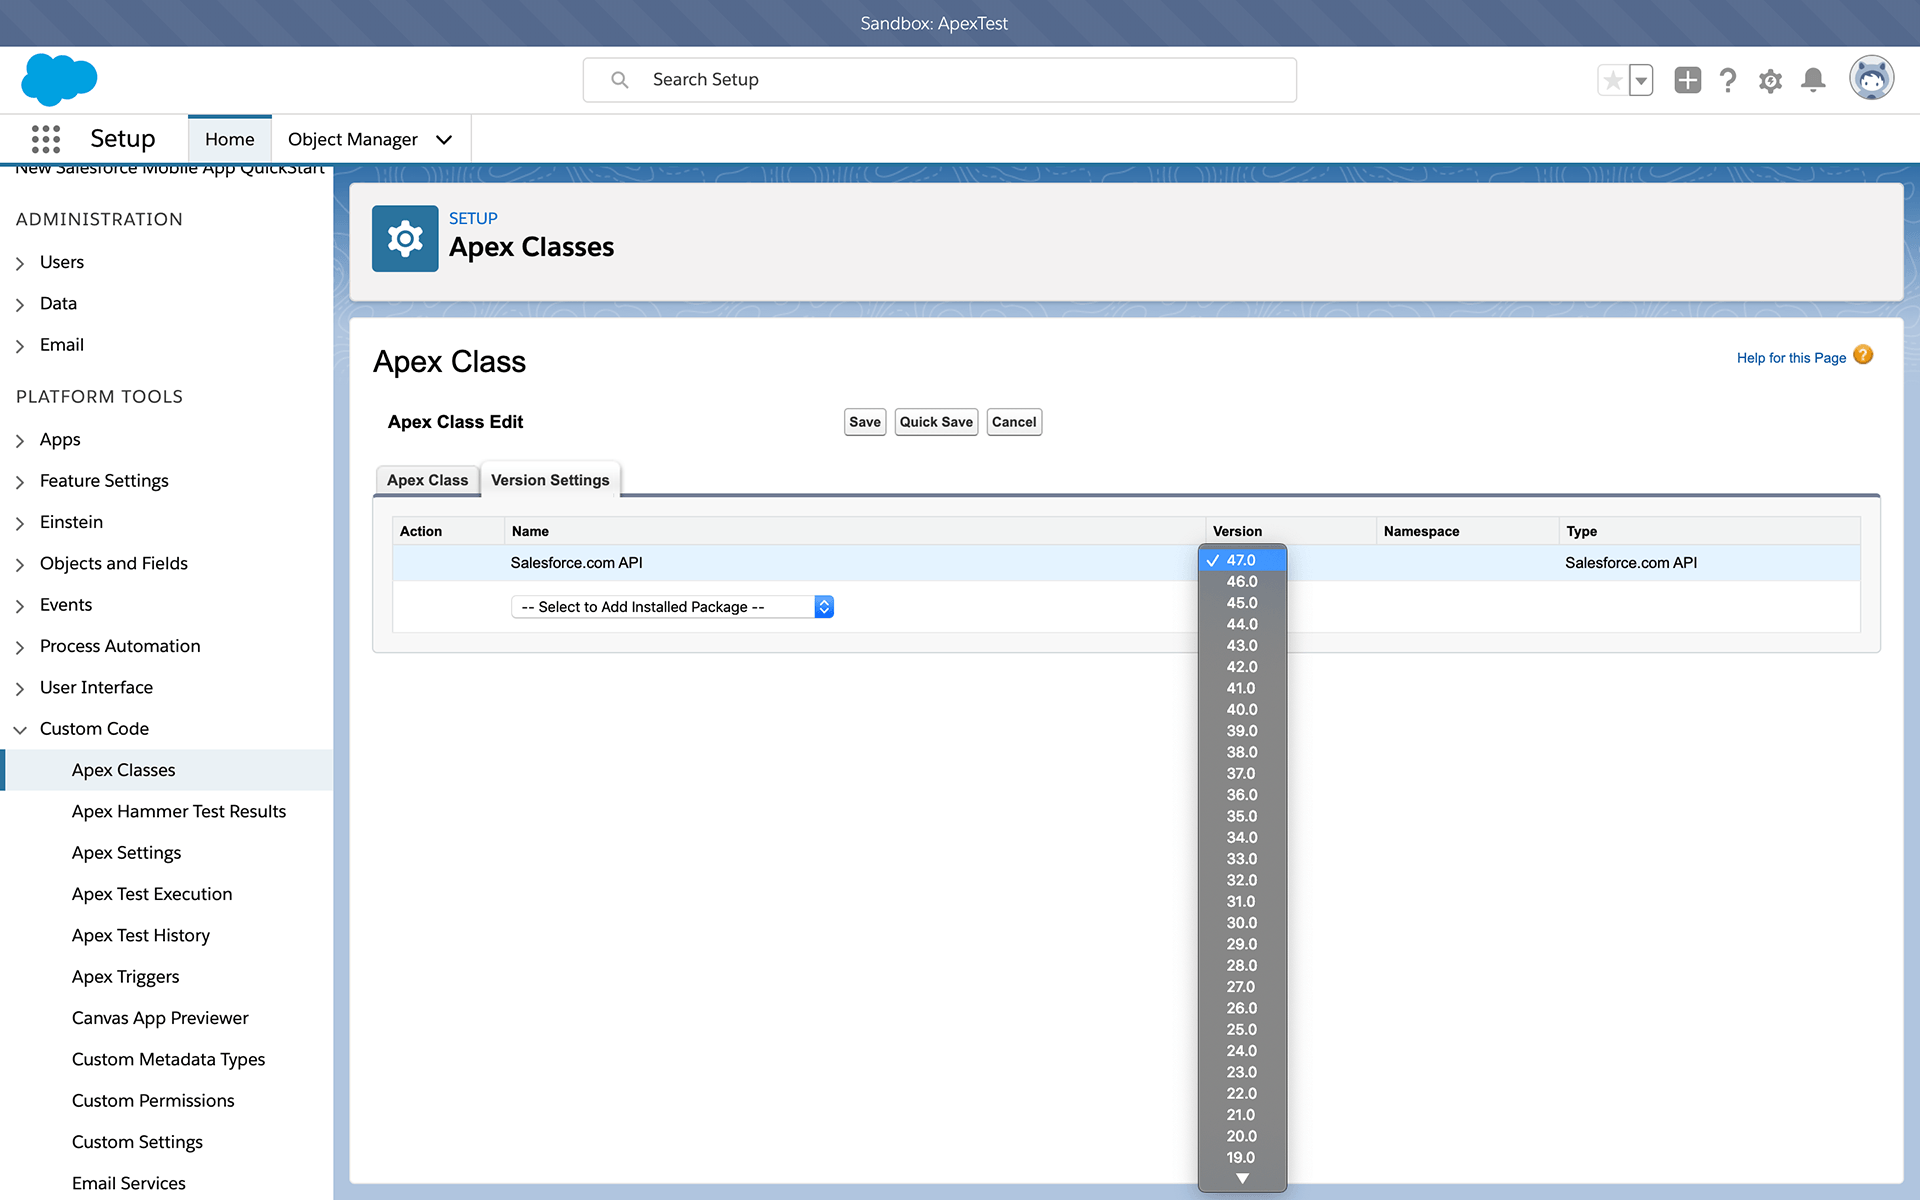
Wondering what your API version number is? Follow the instructions under To identify your current API version.
#5: Create test classes
But wait: you need to create some additional Apex classes—test classes—before you leave. These classes will exist for the sole purpose of validating the base classes you created in the previous step.
Salesforce is being extra protective of your production org here. It’s not enough to have simply relegated your development to a sandbox: Salesforce won’t even let you deploy it until its own internal validation system gives the thumbs up.
I’m weak on the particulars here. I vaguely understand what’s needed and why, but not nearly well enough to explain it with authority.
Here’s my best attempt: that base class from the previous step—it doesn’t actually work except by accessing it via the specified URL. Salesforce can’t validate its code in that form. So what we’re going to do is create a test class that puts the base class through the wringer.
Apex
@IsTest(SeeAllData=true)
private class TCNorg_AllActiveClubhouses_TEST {
    static testMethod void testDoGet() {
        Test.startTest();
        RestRequest req = new RestRequest();
        RestResponse res = new RestResponse();
        req.requestURI = 'https://apextest-clubhouse.cs4.force.com/services/apexrest/AllClubhouses/';
        req.httpMethod = 'GET';
        req.addHeader('Content-Type', 'application/json');
        RestContext.request = req;
        RestContext.response = res;
        List accs = TCNorg_AllActiveClubhouses.getClubhouses();
        System.debug(accs);
        Test.stopTest();
    }
}
At line 2, that’s the name of your class. I would strongly recommend naming your test class whatever the base class is, appended with a _TEST. It just makes good sense.
Line 7 defines the requestURI. Remember that site you created in your production org back in Step 1? Visit those same settings in your sandbox. Notice something? The domain is different here. Copy it. Swap it into the code above. Change “AllClubhouses” to whatever urlMapping you defined in your base class.
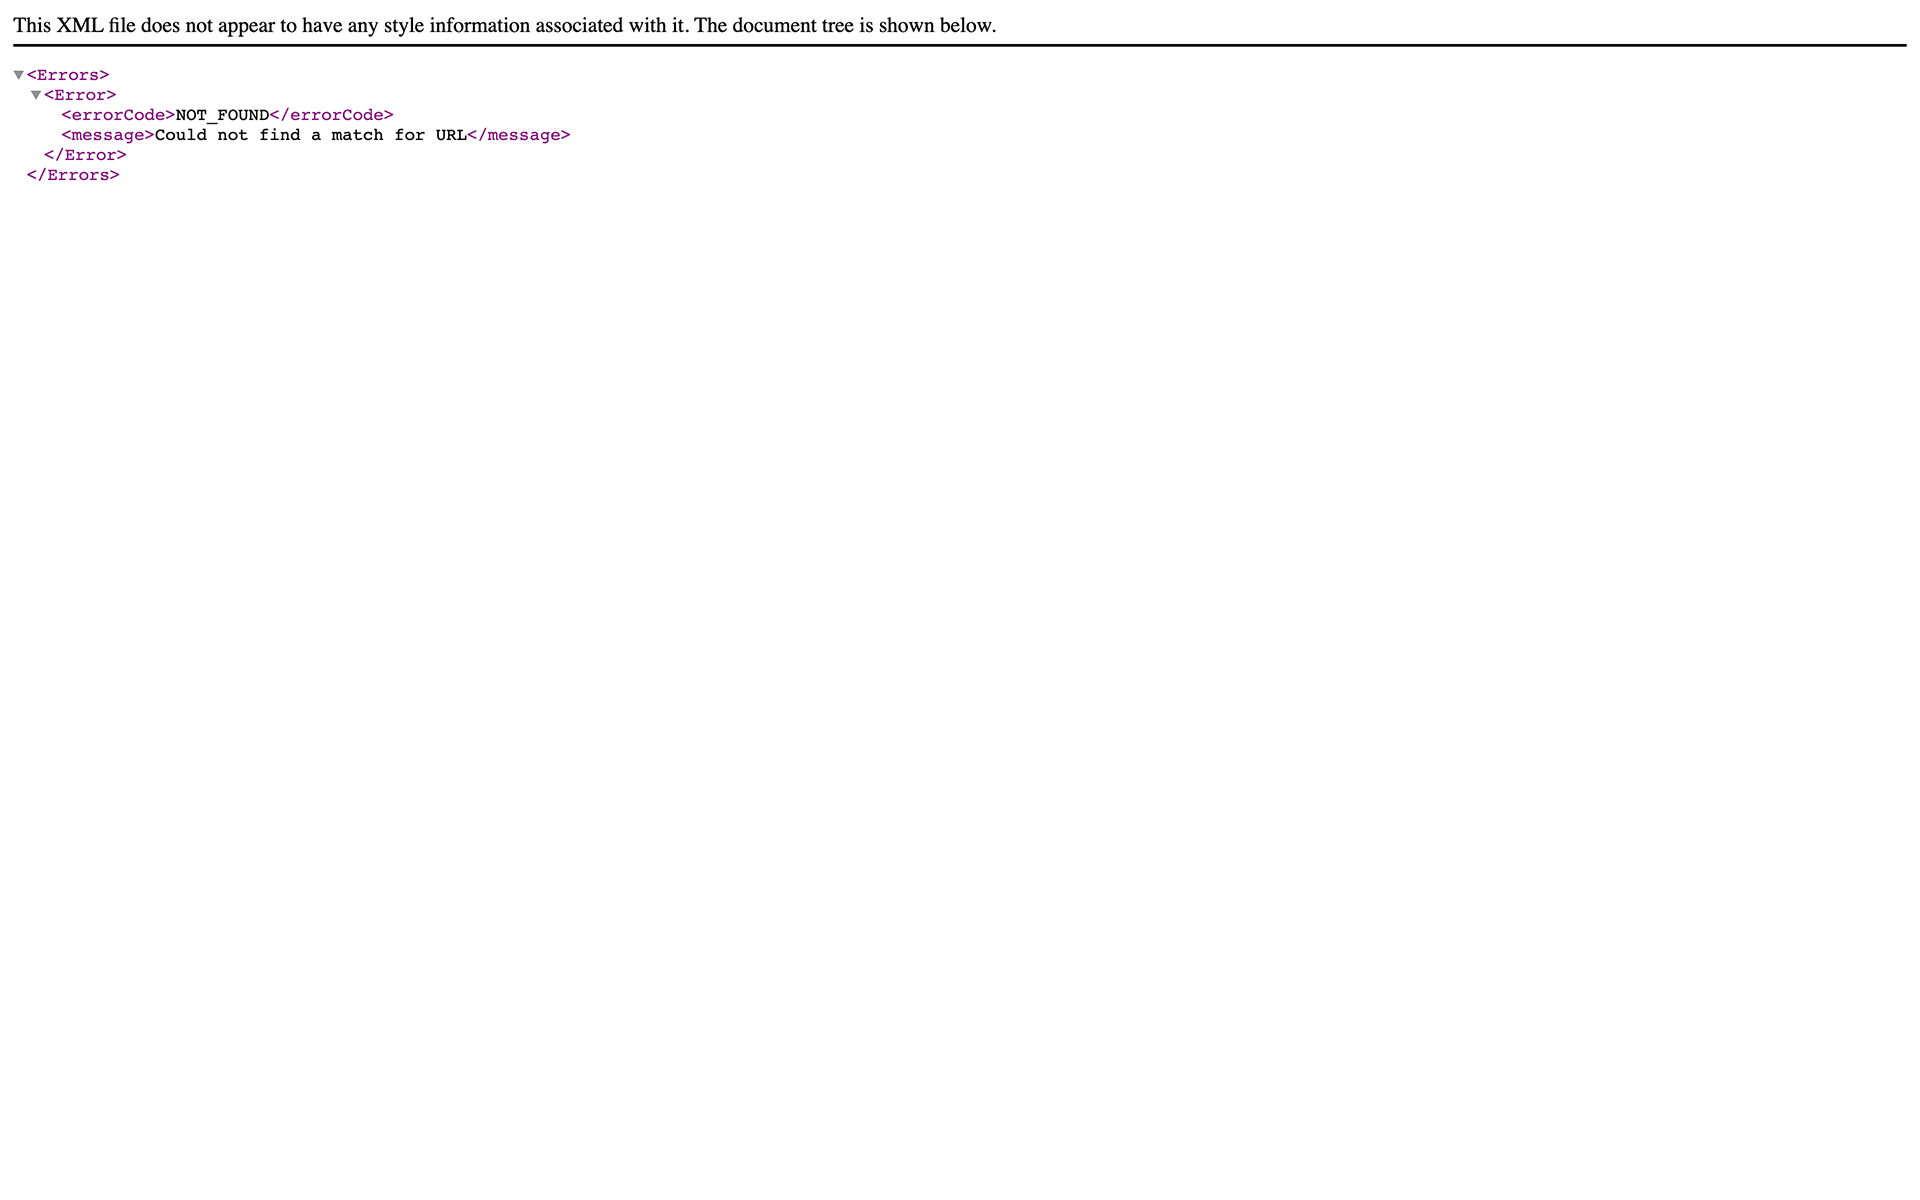
If you’re wondering whether you got the URL right, open up a new tab in your web browser and try to navigate to it. If you see data, your URL is correct. If you see an error code NOT_FOUND, it’s wrong.
Line 12 is going to need some work. <Account> corresponds to the object type being queried; change it appropriately. accs is the name of the variable being defined. This can be anything, as long as that same variable is being referenced in line 13.
Then there is everything after the equal sign. The text before the period is the name of the base class. If you named this test class per my recommendation, you’ll specify everything minus the _TEST. After the period is the name of the function defined in the base class. You’ll find this on Line 4 of the base class.
That’s a test class. Create one of these for every base class you wrote in the previous step.
#6: Create an outbound change set
Once you’re confident in your code, it’s time to get your Apex classes pushed over to your production org.
Setup→Environments→Change Sets→Outbound Change Sets
Click the New button.
Name it. I recommend appending version numbers, i.e. V1, V2, etc.
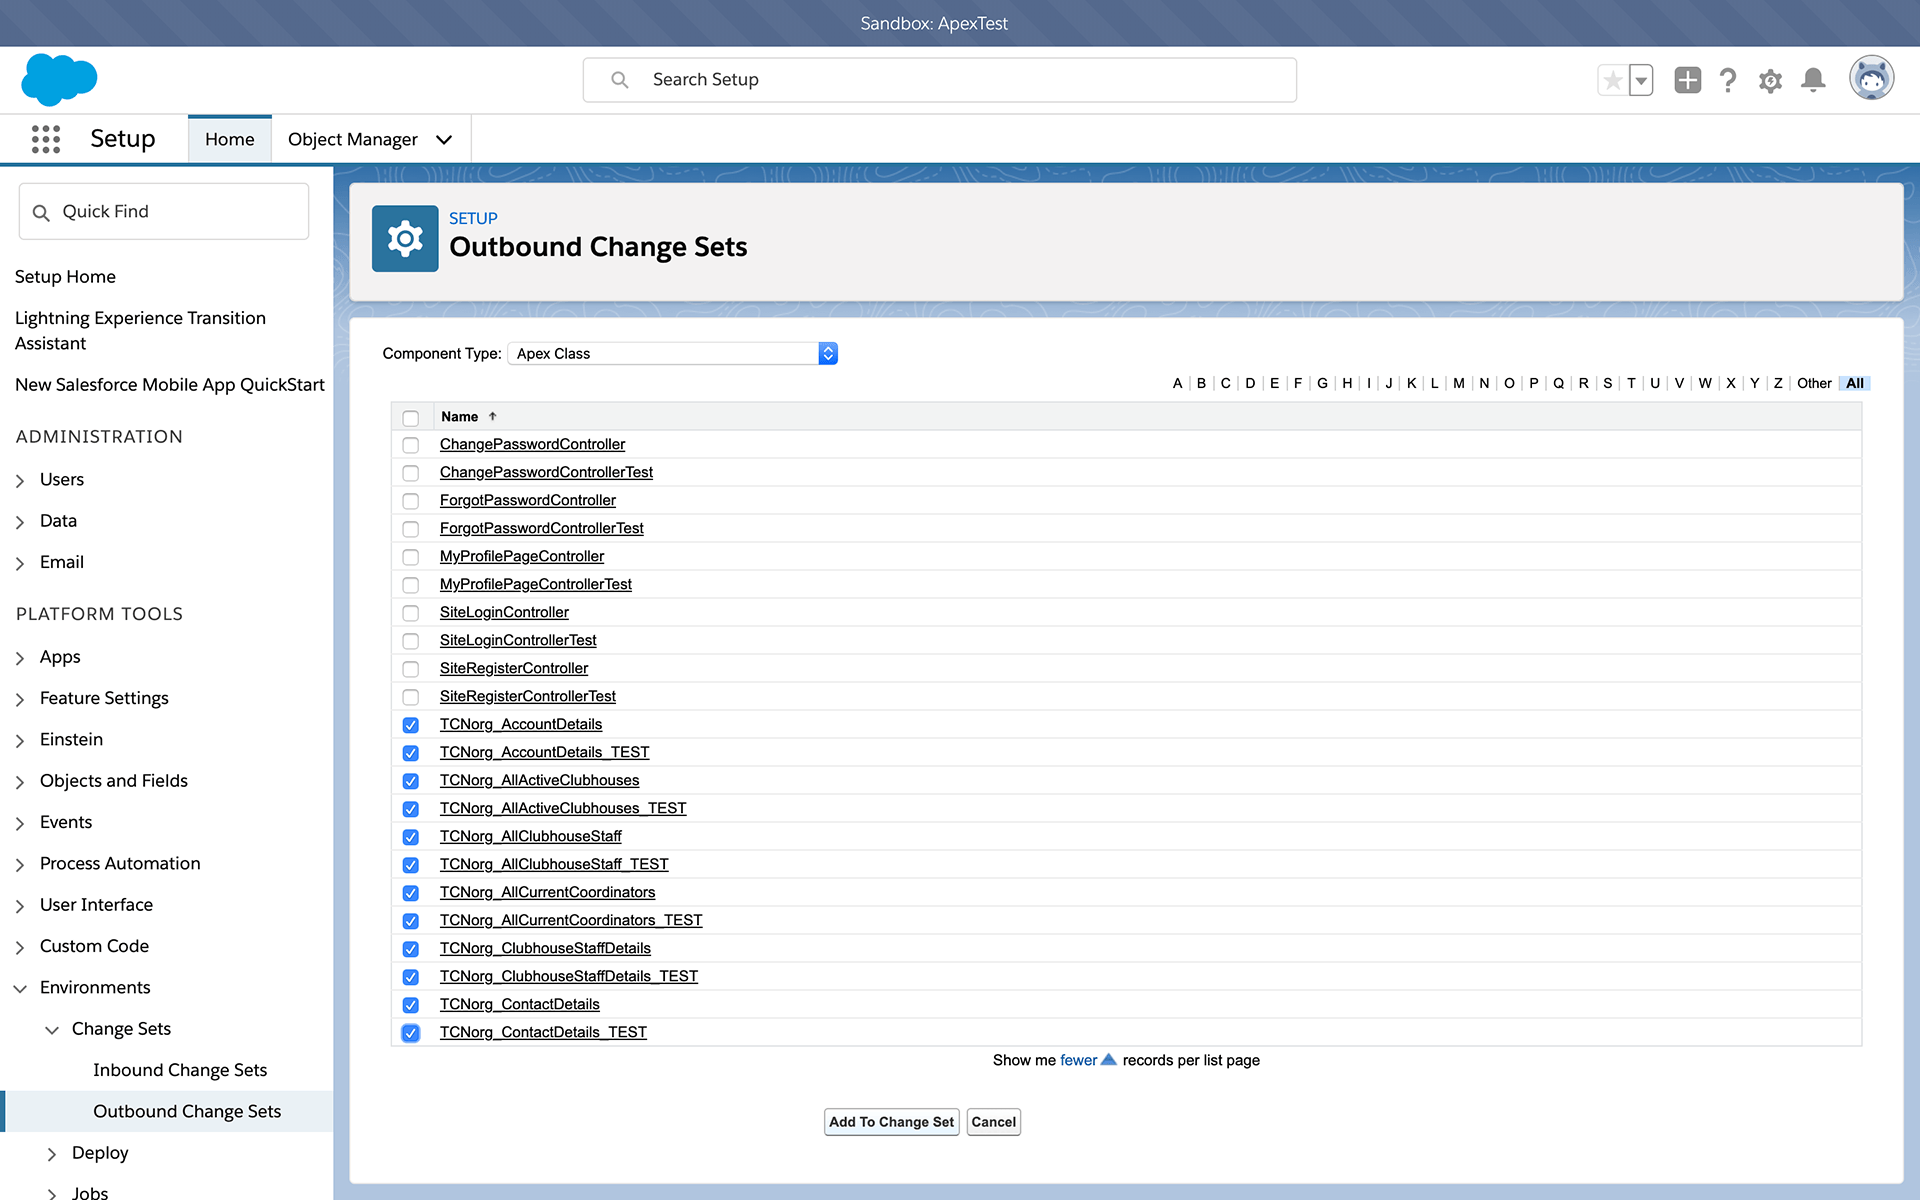
On the next page, under the Change Set Components heading, click Add.
Select Component Type: Apex Class. Here, you should see all of the classes you created. Select all of the base and test classes. Click Add to Change Set.
Back on the previous page, click the Upload button. On the next page, your Target Organization is Production. Click Upload.
You’ll receive an email once the transfer is complete—usually more or less immediately. But the change set probably won’t be fully available on the receiving end for five or more minutes.
#7: Deploy your change set
Log back in to your production org.
Setup→Environments→Change Sets→Inbound Change Sets
If you waited long enough, you should see your change set name from your sandbox listed here. You can either Validate your change set or Deploy it right now. Deployment includes validation, FYI.
Let’s click Deploy. Under Choose a Test Option, Default will do.
Moment of truth.
If your base classes and test classes were all written correctly, they will validate successfully here. And having successfully validated, they will be deployed.
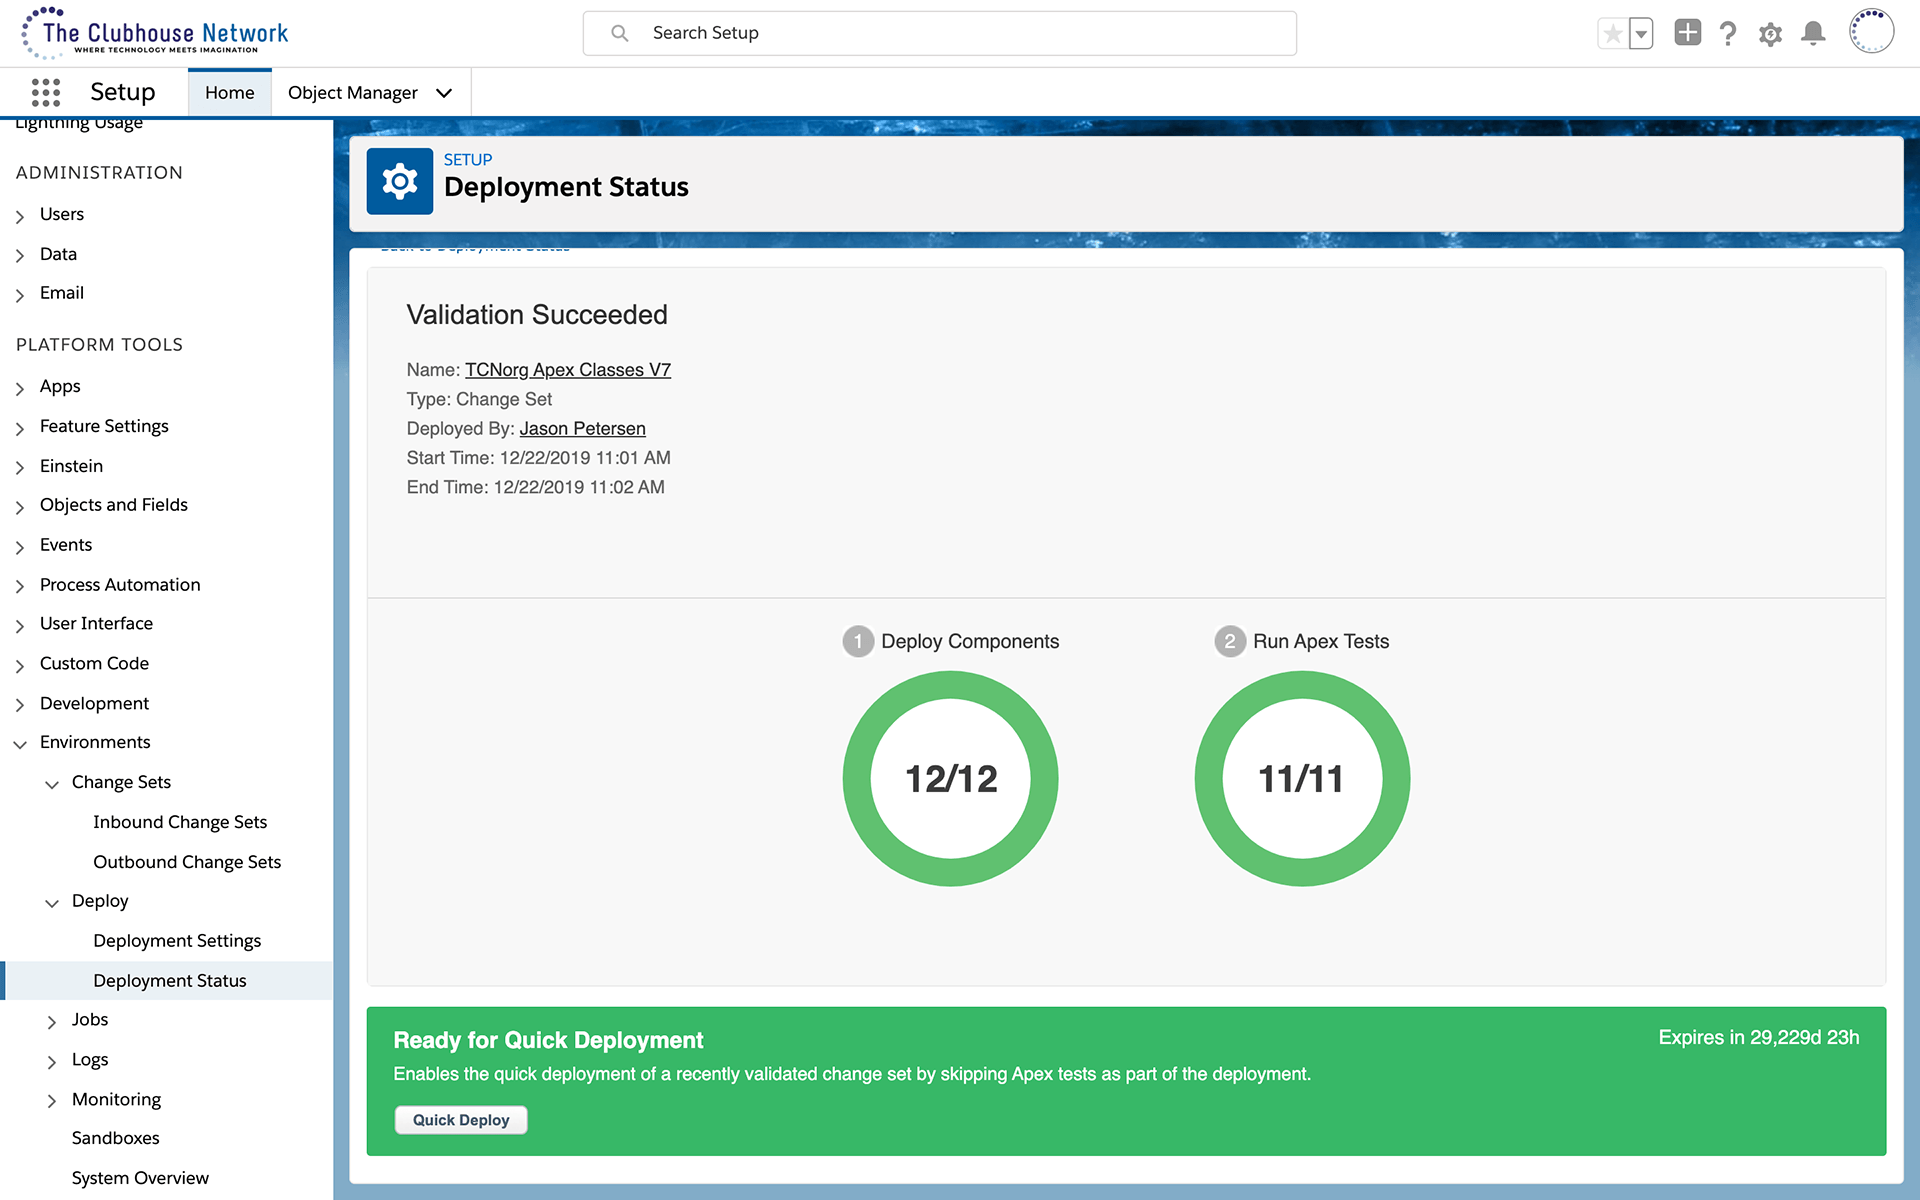
Congratulations: you’re a Salesforce developer! Well, maybe a Google-eloper. But seriously, pop the champagne. This is not beginner stuff.
The hard part’s over, but we’re not quite done yet.
#8: Add classes to your site
You created a site. You created those Apex classes. Now it’s time to put them together.
Setup→User Interface→Sites and Domains→Sites
Click the Site Label, followed by Public Access Settings. Scroll down almost to the bottom, looking for the Enabled Apex Class Access header. Click the Edit button.
Move your classes over from Available to Enabled. Save it.

Now you’re done!
#9: Your final URL(s)
So where’s your data?
Let’s be careful not to mix up your production and sandbox sites; remember that they’re both different. Get the domain name from your production org site. In my case, this was clubhouse.force.com. Append /services/apexrest to that. And finally, remember the urlMapping defined in line 1 of your base class? Mine was /AllClubhouses/.
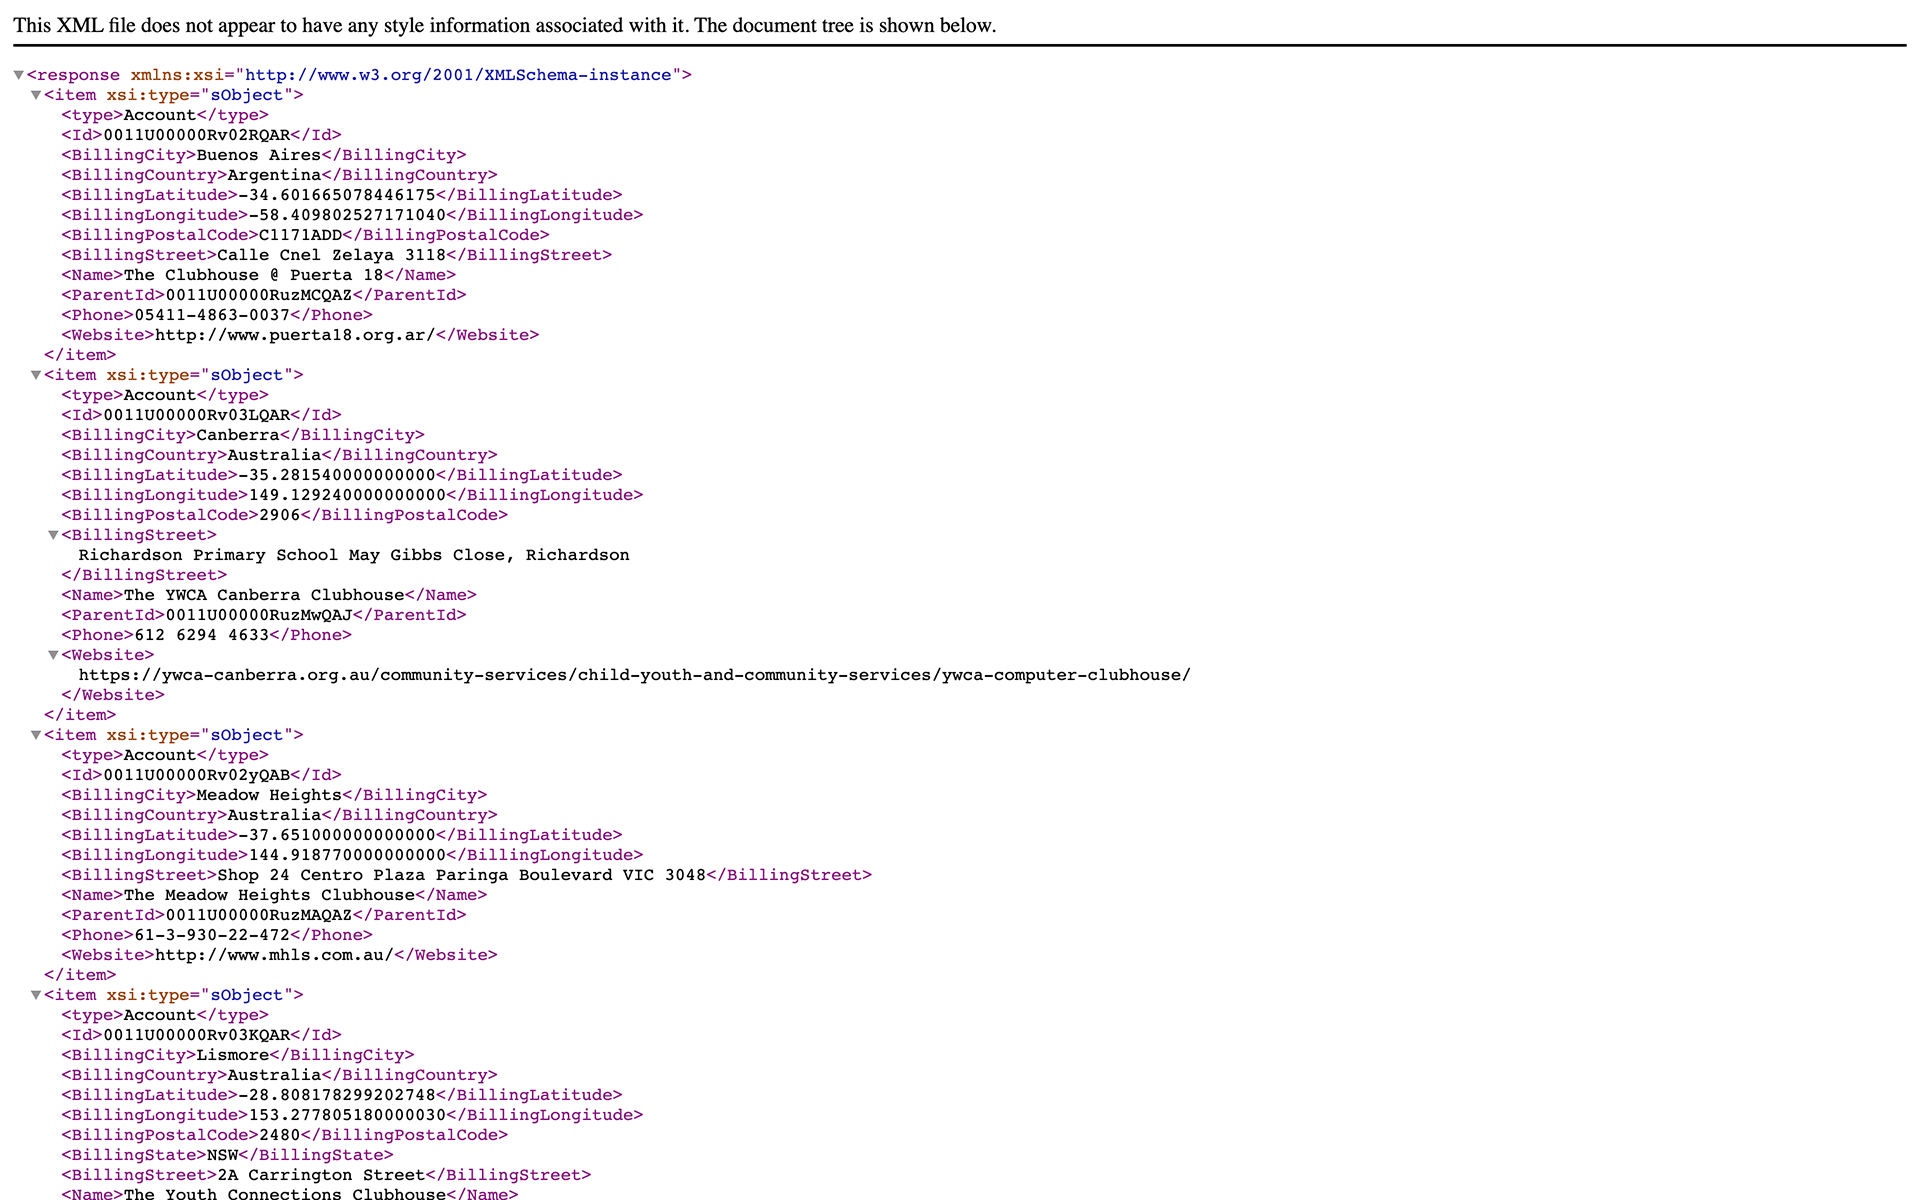
Put it all together, and for me, my full URL is http://clubhouse.force.com/services/apexrest/AllClubhouses/.
Navigate to your URL. If you see the data you’re expecting, presented in XML format, take a bow. You did it!
But what now?
That’s a topic for another article. Your options are extensive.
In perhaps the simplest scenario, you can capture this data into a PHP array using the file_get_contents function. Once you’ve done that, you can manipulate it and present it on your web page with relative ease.
I went a step further and set up a Cron Job with my web hosting company. At regular times throughout the week, a script I wrote pulls the data from my Salesforce org and plugs it into a database table on my company’s WordPress site. It’s easier (and quicker) to query the data from there.
In short, you’re limited only by your imagination as a developer.
Housekeeping
Let’s sum up what we just did.
Salesforce ordinarily requires user authentication to access data from your org. To get around this, we started by creating a public site. This is a domain that anyone on the internet can visit.
We then wrote Apex classes to query specific data from our Salesforce database.
Finally, we attached those Apex classes to our public site. Simply by going to a pre-defined URL at that site, we can execute those queries.
The data is publicly available, but note that we’ve taken measures to ensure that the security risk is extremely low:
- Someone has to know what the URL is, which is extremely unlikely.
- You’ve written a precise query that only returns a limited subset of your data.
- You’re only utilizing the @HttpGet protocol. There is no risk to the integrity of your Salesforce database.
I hope this was helpful. Good luck! Feel free to reach out if you have any difficulties.